AOMEI's backup support software that allows you to use the main backup functions and schedule functions for free
AOMEI Backupper Standard is a multifunctional product developed by Chinese software vendor "AOMEI Technology". Free backup softwareIt's free, but you'll get access to key backup features and schedules, as well as technical support (weekdays only), which is rare for the free version.
System requirements
Version 6 Currently
OS: Windows XP / Vista / 7/8/10 (32bit / 64bit)
* A writable optical drive is required to create bootable media.
Where to get the software
AOMEI Backupper Standard Official Download Page
Install AOMEI Backupper Standard
AOMEI Backupper Standard does not include adware or spyware that security software detects, but AOMEI Backupper ads appear in notifications when the app launches.
Click "Free Download" on the AOMEI Backupper Standard download page.
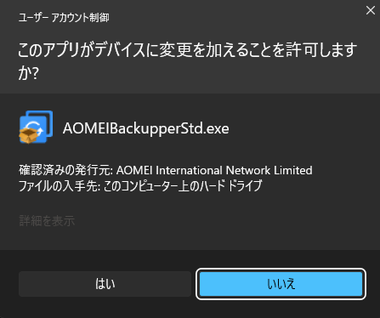
Launch the downloaded installer, and when the User Account Control message is displayed, click "Yes" to allow it.
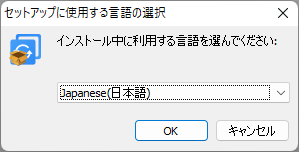
The language selection screen will be displayed. Confirm that it is "Japanese" and click "OK".
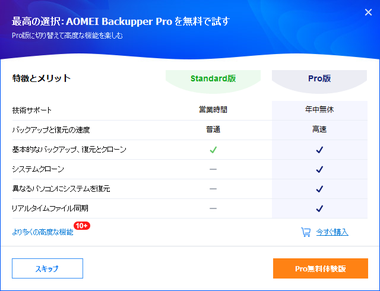
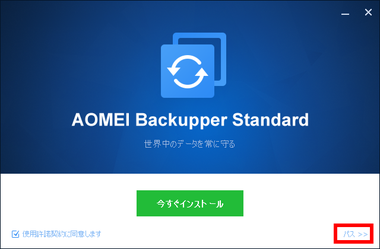
"Skip" to use the free version of AOMEI Backupper.
Check the license agreement and if there are no problems, click "Install Now".
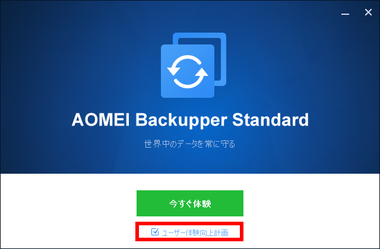
After the installation is complete, click "Experience Now".
The User Account Control dialog will be displayed at startup. If you allow it with "Yes", AOMEI Backupper Standard will start.
Creating bootable discs
Since the boot media to be created is about 400MB in size, a CD-R can also be used, and a blank media is set in a writable optical drive, or a USB memory that can be formatted is connected to the PC.
Select "Create Bootable Disc" from "Tools" on the left sidebar.
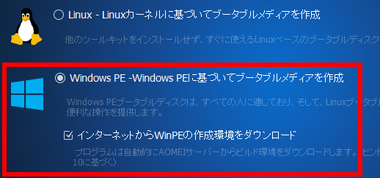
Select "Windows PE".
For the boot mode, select "UEFI bootable disk" if the PC used is UEFI, or select "legacy bootable disk" if the PC is BIOS.
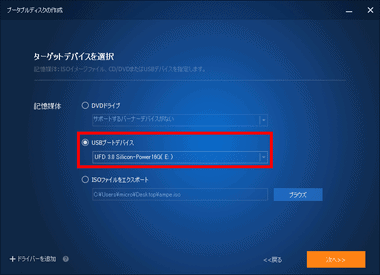
After selecting "USB boot device", specify the USB memory set in the PC and click "Next".
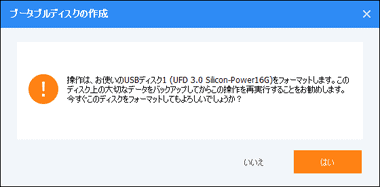
Check the dialog and click "Yes" to start creating the boot media.
Startup test
Test the operation of the created boot media.
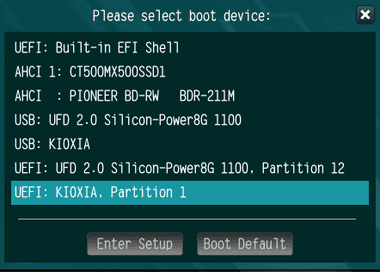
Call the boot menu on your PC and specify the boot media.
For legacy bootable discs, the message "Press any key to boot from USB" will appear, so press any key.
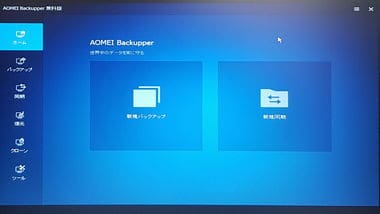
The test is complete when AOMEI Backupper starts.

Installing and using Rufus
Free software to create a USB memory boot drive Rufus is an open source USB boot drive creation software developed by Pete Batard, which is an OS disk image file (.iso […]].
How to use AOMEI Backupper Standard
The free version of AOMEI Backupper Standard provides features such as "System Backup and Restore", "Data File Backup and Restore", and "File Sync", and the backup file is saved as an image file with the extension .adi to restore the data. Also run with AOMEI Backupper.
See below for backup

Windows backup settings and restore method
Differences in backup functions implemented by Windows and how to set them Windows has a practical backup function that can roll back system and user files in case of unforeseen circumstances, and repairs and first […] to eliminate problems.
backup
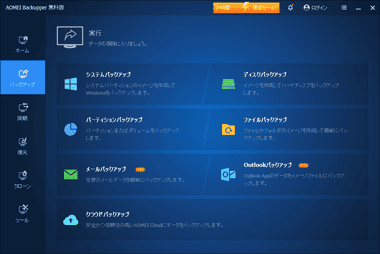
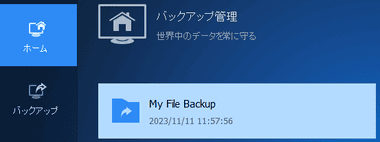
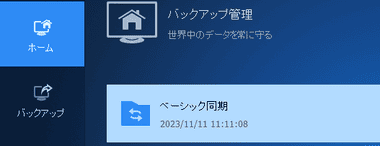
There are "system backup", "file backup", and "disk backup" in the backup, and when the backup is executed, it is added as a "task".
System backup
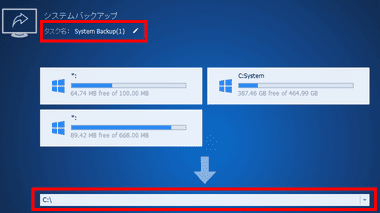
The system backup includes the Windows installed on the C drive, applications, drivers, and the partitions required for Windows to operate.
For system backup, select "System Backup" from "Backup" on the left sidebar.
Specify the save destination of the backup file.
The task name is set automatically, but make it a descriptive name when you "restore".
Click "Start" to start the backup process.
The backup settings are fine by default, but you can change them in the "Options" if necessary.
Schedule
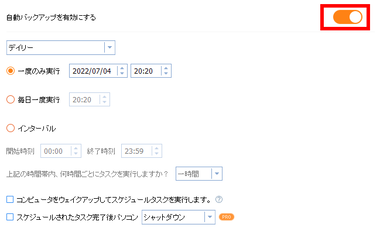
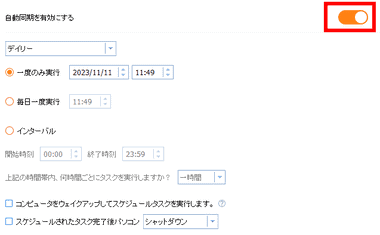
If you want to schedule the backup, click "Schedule" and make any settings.
System backup defaults to Incremental Scheme and can also be changed to Full Backup on the Details tab.
After one full backup, only the changed part is backed up, and when restoring to the latest backup, all backup files including the full backup are required, but the backup time and file size There is a merit that can save.
Full backup
Restoration is possible with a single file because the entire system drive is backed up each time, but the backup time and size will increase.
Diff scheme (not available in free version)
In order to back up the changed part for one full backup and full backup, restore with two data, full back file and differential backup.
Backups take longer than incremental backups, but they require fewer files to restore, reducing the risk of a restore.
If you have set a schedule, select any menu from the list of "Start" buttons.
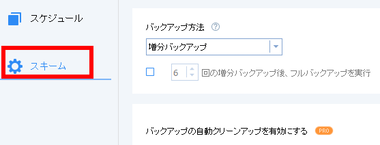
Scheme (paid function)
"Backup scheme" is a function that can be used with paid AOMEI Backupper Pro, and you can set automatic deletion of backup files.
Select "Scheme" to set automatic deletion of backup files.
After upgrading to AOMEI Backupper Pro, "Enable Backup Schemes" will be available and you can set each scheme from the list.
The "Group" used in the scheme settings is "Full Backup 3 + Incremental 1 + Incremental 1" when the number of backups held by the incremental backup scheme is 2, and the next group "Full Backup 1 +" The group of "Full Backup 2 + Increment 3 + Increment 4" is automatically deleted when "Increment 1 + Increment 1" is generated.
File backup
File backup backs up any folder or file as an image file.
For system backup, select "File Backup" from "Backup" on the left sidebar.
Set an arbitrary task name and specify the folder / file to be backed up from "Add folder / Add file".
Multiple folders / files to be backed up can be registered. Select "Folders / Files" from the list, specify the items to be backed up, and then set the backup destination.
Disk backup
Disk backup includes information such as SSD / HDD partitions installed on the PC.
For disk backup, select "Disk Backup" from "Backup" on the left sidebar.
Set any task name and click "Add Disk".
Select the disk to be backed up from the "Disk Selection Screen" and click "Add".
Multiple disks can be selected.
Partition backup
While disk backup backs up the entire SSD / HDD, "partition backup" backs up in units of drives created on the disk.
For partition backup, select "Partition Backup" from "Backup" on the left sidebar.
Set any task name and click "Add Partition".
Multiple partitions (drives) can be specified as with disk backup.
Sync
Since the backup is saved as an image file, "Restore" is required to use it, whereas "Synchronize" copies the specified folder / file to another location and does not restore the backed up file. Can be used for.
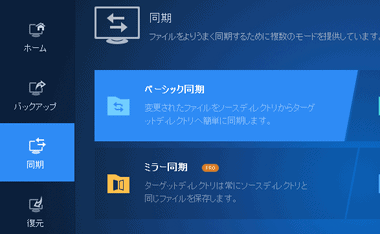
Select "Basic Sync" from "Sync" on the left sidebar.
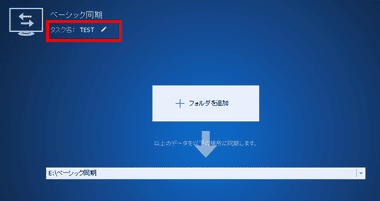
Specify the folder to be synchronized.
Real-time synchronization (paid function)
Real-time synchronization is like online storage such as OneDrive or Dropbox in the local environment, and it monitors the target folder and reflects the changes in the folder to the target in real time.
Click "Real-time sync" on the sync settings screen.
If you want to delete the objects deleted from the backup source folder from the target destination as well, check "Delete files from source directory".
復 元
"Restore" is an operation to extract the backed up image file, select the backup file, and specify the extraction destination.
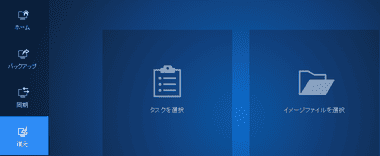
Click "Select Image File" from "Restore" on the left sidebar and specify the backup file to extract.
Restoration is in a wizard format, and the settings differ depending on the selected task, but the basic procedure is "Specify the data to be restored"-> "Specify the destination to expand the restored data".
Restore system backup
Restoring a system backup differs depending on whether you are restoring to an existing system drive or to another disk, and a reboot is required to restore to an existing system drive.
System backup overwrites the current system drive by default.
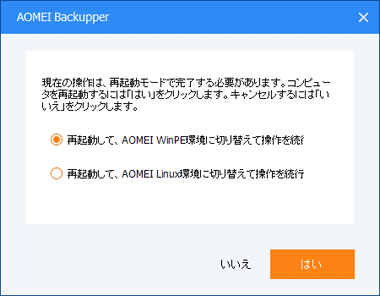
When restoring a system backup to an existing disk Since it cannot be overwritten if Windows is running, restart it to start "Windows PE" that runs on memory, and then expand the backup file. Enable "Switch to AOMEI WinPE environment and continue operation" and click "Yes".
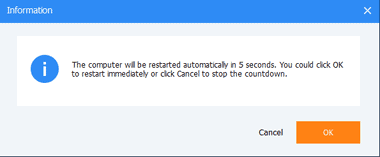
After restarting, AOMEI Backupper Standard will start automatically after WindowsPE starts and the restoration process will start.
When the process is completed, a restart message will appear, so click "OK".
When you restart, it is restored including the installed application.
Restore to another disk
System backup files can be restored to a destination other than the existing system disk.
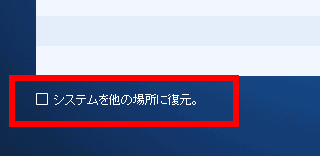
If you want to deploy to another location, check "Restore system to another location".
A list of disks installed on the PC is displayed, so specify the partition to restore to.
Note that if you specify an existing partition as the restore destination, the system disk configuration will be expanded in the partition, so even if you specify the restored disk as the boot disk, Windows will not start.
Restore disk backup
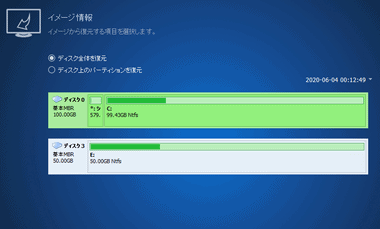
Restoring a disk backup restores the backup file to the specified disk.
If you are backing up multiple disks, select the disk you want to restore.
Specify the restore destination disk.
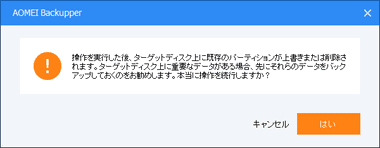
A confirmation message will be displayed confirming that the data on the restore destination disk will be erased, and clicking "Yes" will start the restore.
Restore data backup
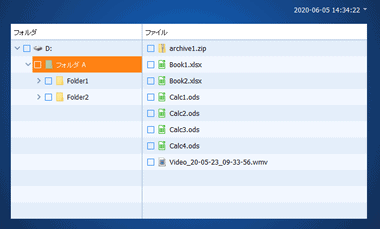
Data backup can be restored by specifying any file from the backed up image file.
After selecting any backup file from the list of dates, you can expand the backup file in a tree, so check the folder / file you want to restore.
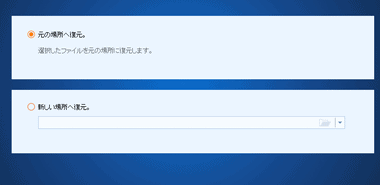
"Restore to original location" rolls back the selected folders / files to the backup data, and "Restore to new location" restores the backup files to any location while leaving the source.
clone
Clone is a function that replicates to other disks connected to the PC, including the partition configuration of the disk, and can be cloned if the disk size of the target disk is larger than the capacity of the clone source disk.
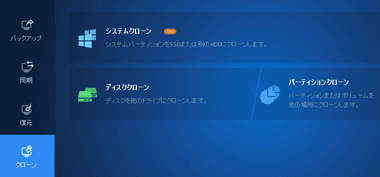
Select "Disk Clone" or "Partition Clone" from "Clone" on the left sidebar.
Duplicate the specified disk to the target disk.
Partition clone
Duplicate the specified partition / volume to any location.
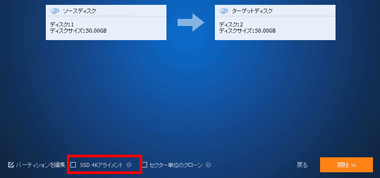
Select the disk / partition to duplicate.
Select the destination disk / partition.
Check the dialog and click "Yes".
If the target disk is SSD, enable "SSD 4K Alignment" and click "Start".
How to buy AOMEI Backupper Pro
AOMEI Backupper Pro has a "regular license" for which you can upgrade for a fee and a "permanent license" for free upgrade to a new version. One license for a perpetual license is about 1 yen, and payment is a German payment agency service with a Japanese subsidiary. "Clever Bridge".
AOMEI Backupper Pro purchase page
"Regular license" "Permanent license"
After confirming the product and price on the purchase page, enter the required items.
When the authentication of payment information is completed, the final confirmation screen will appear, so click "Buy now".
When the payment is completed, the product key will be displayed at the same time as the order number, so copy it.
"Register" from the menu of AOMEI Backupper Standard.
Paste the copied product key and click "Register".
Upgrade completed.
License migration
If you want to transfer the purchased license to another PC, write the information at the time of license purchase such as "order number", "name", "registered email address" in the email. AOMEI support If you contact (Japanese support), they will respond.
Related article

Installing and using EaseUS Todo Backup Free
EaseUS Todo Backup Free, a free backup software for backing up drives and systems, is developed by Chinese software vendor CHENGDU YIWO Tech Co., Ltd. […]

Installing and using AOMEI Backupper Standard
AOMEI's backup support software AOMEI Backupper Standard is a Chinese software vendor "AOMEI Technology […]" that allows you to use the main backup functions and schedule functions for free.

Installing and using SysTools Gmail Backup
Gmail and Google Calendar backup tool SysTools Gmail Backup is a backup tool for emails sent and received by Gmail, Google Calendar, contacts, Google Drive […]